

Pinwheel Cookies Recipe – Easy Swirled Butter Cookies
Introduction to Pinwheel Cookies
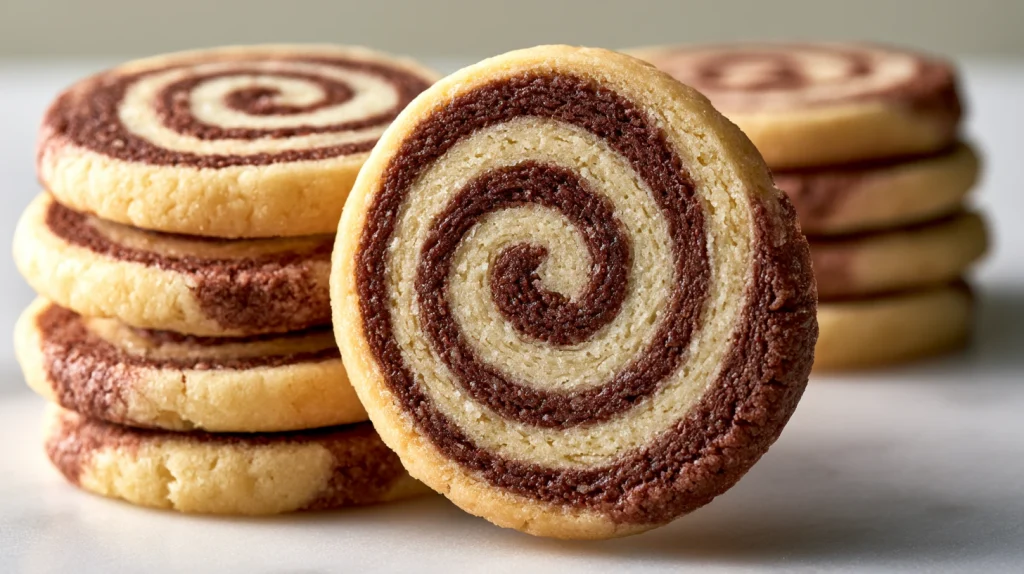
Pinwheel cookies are one of the most recognizable homemade cookies because of their beautiful spiral design and rich buttery flavor. They are made by layering vanilla and chocolate cookie dough, rolling the dough into a tight log, chilling it until firm, and slicing it into perfectly round cookies before baking. Every cookie reveals an eye catching swirl that makes them look special without requiring advanced baking skills.
The flavor of pinwheel cookies is simple yet satisfying. The vanilla dough is buttery and lightly sweet, while the chocolate dough adds a rich cocoa taste that balances every bite. Together, they create a cookie that is crisp around the edges, tender in the center, and full of homemade goodness.
Many home bakers enjoy making pinwheel cookies because they are as fun to prepare as they are to eat. Rolling the dough into a spiral and slicing it into neat rounds creates cookies that look impressive on dessert trays, gift boxes, and holiday cookie platters. They are also an excellent baking project for families because children enjoy watching the swirl appear in every slice.
These cookies are especially popular during the holiday season. They fit perfectly alongside Easy Christmascookies, making them one of the most loved choices for festive baking. If you are searching for a Christmas Cookie Recipe Easy enough for beginners while still looking bakery quality, this recipe delivers dependable results every time.
Pinwheel cookies are also a wonderful choice for bake sales, cookie exchanges, and homemade gifts. Their attractive appearance makes them ideal Christmas Cookies To Sell, while their delicious flavor makes them a favorite Christmas Dessert Cute enough for every celebration. Once you learn this classic Pinwheel Cookie Recipe, you can create beautiful homemade cookies whenever you want.
Why You’ll Love This Recipe
Preparation and Cooking Time
Ingredients
For the Cookie Dough
Substitution Notes
Step by Step Instructions

Step 1: Prepare the Dry Ingredients
Whisk together the flour, baking powder, and salt in a medium bowl until evenly combined, then set the mixture aside so it is ready to be added gradually to the wet ingredients.
Step 2: Cream the Butter and Sugar
Place the softened butter and granulated sugar into a large mixing bowl and beat them together for about 3 to 4 minutes until the mixture becomes light, creamy, and fluffy before mixing in the egg and vanilla extract until fully incorporated.
Step 3: Make the Dough
Gradually add the dry ingredients to the butter mixture while mixing on low speed, then pour in the milk and continue mixing just until a soft dough forms without overworking it.
Step 4: Divide the Dough
Transfer the dough onto a clean work surface and divide it into two equal portions, placing each half into a separate mixing bowl so one can remain vanilla while the other becomes chocolate.
Step 5: Prepare the Chocolate Dough
Add the cocoa powder to one portion of the dough and mix until the color is completely even and no dry cocoa remains, creating a smooth chocolate dough with a rich color.
Step 6: Roll the Dough
Place each portion of dough between two sheets of parchment paper and roll them into rectangles about ¼ inch thick, making both pieces as close to the same size as possible so they layer evenly during assembly.
Step 7: Layer the Dough
Carefully remove the top sheet of parchment paper from both rectangles, place the chocolate dough directly on top of the vanilla dough, then gently press across the surface with a rolling pin so the two layers stick together without becoming thinner.
Step 8: Roll into a Log
Starting from one long edge, roll the layered dough into a tight log while keeping steady pressure with your hands to create an even spiral, then pinch the seam lightly to seal the roll.
Step 9: Chill the Dough
Wrap the dough log tightly in plastic wrap and refrigerate it for at least 2 hours or until it becomes firm enough to slice without losing its round shape.
Step 10: Slice the Cookies
Preheat the oven to 350°F (175°C), line baking sheets with parchment paper, then slice the chilled dough into rounds about ¼ inch thick using a sharp knife and place them about 2 inches apart on the prepared baking sheets.
Step 11: Bake the Cookies
Bake the pinwheel cookies for 10 to 12 minutes until the edges are lightly golden while the centers remain pale, taking care not to overbake so the cookies stay tender.
Step 12: Cool Completely
Allow the pinwheel cookies to rest on the baking sheet for 5 minutes before transferring them to a wire rack to cool completely, giving them time to firm up while keeping their delicate texture.
How to Serve
Pinwheel cookies are beautiful enough to serve on their own, but a thoughtful presentation makes them even more inviting.
Additional Tips
Recipe Variations
Freezing and Storage
Nutritional Information
Approximate values per cookie.
Final Words
Pinwheel cookies are a timeless homemade treat that combines a rich buttery flavor with an elegant swirl that never goes out of style. Although they look impressive, the process is straightforward and rewarding, making this recipe suitable for both beginner and experienced bakers.
Whether you are preparing Easy Christmascookies for your family, looking for a reliable Christmas Cookie Recipe Easy enough for holiday baking, or making Christmas Cookies To Sell at a bake sale, these cookies deliver beautiful results every time. Their crisp edges, tender centers, and classic vanilla and chocolate swirls make them a favorite on every dessert table.
Keep this recipe in your baking collection and enjoy experimenting with different flavors and seasonal colors throughout the year. Once you bake these homemade pinwheel cookies, they are sure to become one of your most requested holiday treats and a recipe you’ll proudly share with family and friends.
Frequently Asked Questions

Pinwheel Cookies Recipe: Classic Swirled Butter Cookies for Every Occasion
36
servings35
minutes2
hours120
kcalIngredients
- For the Cookie Dough
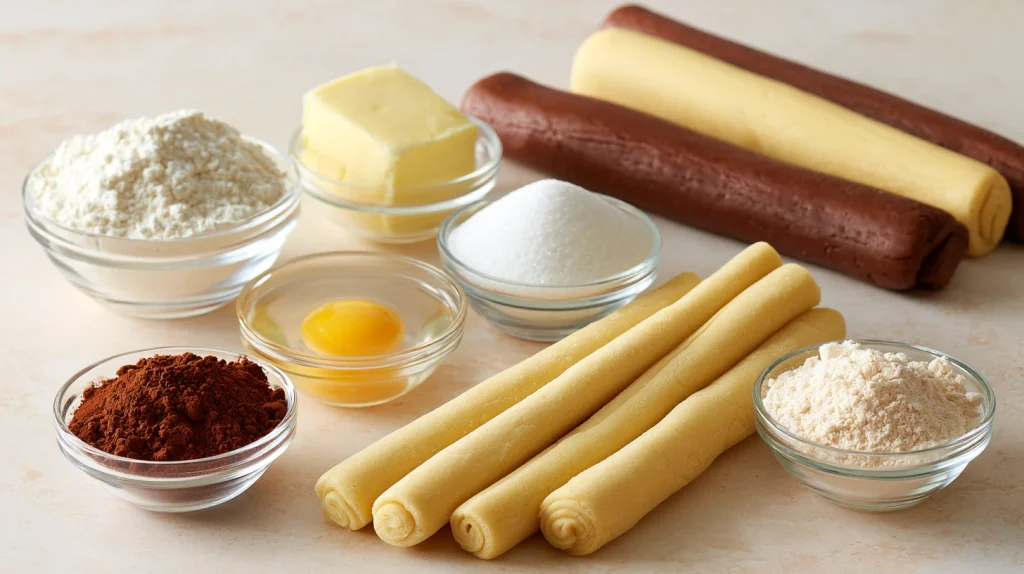
2½ cups (315 g) all purpose flour
½ teaspoon baking powder
¼ teaspoon salt
1 cup (227 g) unsalted butter, softened
1 cup (200 g) granulated sugar
1 large egg
2 teaspoons vanilla extract
2 tablespoons whole milk
3 tablespoons unsweetened cocoa powder
Directions
- Whisk together the flour, baking powder, and salt in a medium bowl until evenly combined, then set the mixture aside so it is ready to be added gradually to the wet ingredients.
- Place the softened butter and granulated sugar into a large mixing bowl and beat them together for about 3 to 4 minutes until the mixture becomes light, creamy, and fluffy before mixing in the egg and vanilla extract until fully incorporated.
- Gradually add the dry ingredients to the butter mixture while mixing on low speed, then pour in the milk and continue mixing just until a soft dough forms without overworking it.
- Transfer the dough onto a clean work surface and divide it into two equal portions, placing each half into a separate mixing bowl so one can remain vanilla while the other becomes chocolate.
- Add the cocoa powder to one portion of the dough and mix until the color is completely even and no dry cocoa remains, creating a smooth chocolate dough with a rich color.
- Place each portion of dough between two sheets of parchment paper and roll them into rectangles about ¼ inch thick, making both pieces as close to the same size as possible so they layer evenly during assembly.
- Carefully remove the top sheet of parchment paper from both rectangles, place the chocolate dough directly on top of the vanilla dough, then gently press across the surface with a rolling pin so the two layers stick together without becoming thinner.
- Starting from one long edge, roll the layered dough into a tight log while keeping steady pressure with your hands to create an even spiral, then pinch the seam lightly to seal the roll.
- Wrap the dough log tightly in plastic wrap and refrigerate it for at least 2 hours or until it becomes firm enough to slice without losing its round shape.
- Preheat the oven to 350°F (175°C), line baking sheets with parchment paper, then slice the chilled dough into rounds about ¼ inch thick using a sharp knife and place them about 2 inches apart on the prepared baking sheets.
- Bake the pinwheel cookies for 10 to 12 minutes until the edges are lightly golden while the centers remain pale, taking care not to overbake so the cookies stay tender.
- Allow the pinwheel cookies to rest on the baking sheet for 5 minutes before transferring them to a wire rack to cool completely, giving them time to firm up while keeping their delicate texture.