

Refried Beans Recipe Canned | Easy Creamy Beans
Introduction to Refried Beans Recipe Canned
A good refried beans recipe canned is one of the easiest ways to turn a pantry staple into a satisfying homemade side dish. Canned refried beans are already cooked, but with a few simple additions, you can improve their texture, deepen their flavor, and make them taste much more like something prepared from scratch.
The key is not simply heating the beans. Canned beans can sometimes be thick, salty, or slightly flat in flavor. Cooking them gently with sautéed onion, garlic, spices, and a little liquid transforms them into a creamy mixture with much better depth. A small amount of lime juice at the end adds brightness and keeps the rich beans from tasting heavy.
This refried beans recipe canned method is especially useful when you need a fast side dish for tacos, burritos, enchiladas, quesadillas, rice bowls, or grilled meats. Since the beans are already cooked, there is no soaking, boiling, or long preparation involved. The entire recipe can be finished in about 20 minutes.
The texture is easy to customize. If you enjoy smooth beans, mash them thoroughly and add enough liquid to create a silky consistency. If you prefer a more rustic texture, leave some of the beans partially intact. Either way, the finished dish should be thick enough to hold its shape on a plate while remaining soft enough to spread easily.
This recipe is also useful beyond the dinner table. Thick refried beans can become fillings for burritos, layers in bean dips, toppings for tostadas, or the base of quick nachos. That makes a well prepared batch especially valuable for busy home cooks.
If you are searching for Quick And Easy Refried Beans that taste better than simply opening a can and warming it, this method gives you a reliable starting point. You can keep it mild for the whole family or add jalapeño, chipotle, cheese, or extra spices when you want more personality.
Why You’ll Love This Recipe
Preparation and Cooking Time
Ingredients
For the Refried Beans
Optional Toppings
Substitution Notes
Step-by-Step Instructions

Step 1: Prepare the Ingredients
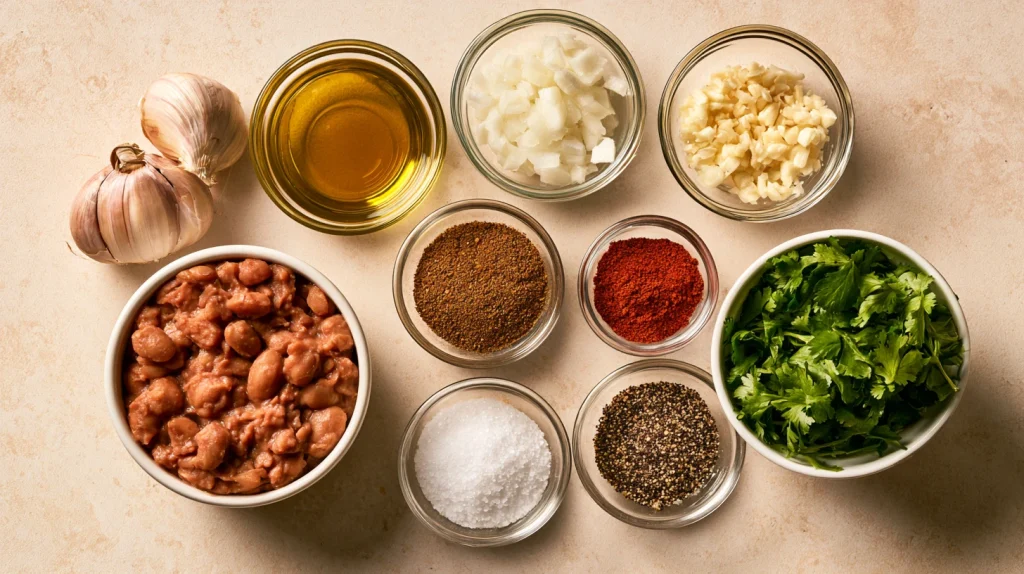
Finely dice the onion, mince the garlic, measure the spices and broth, and open the cans of refried beans so everything is ready before you begin cooking because the aromatics cook quickly once the skillet is hot.
Step 2: Sauté the Onion
Heat the olive oil in a medium skillet over medium heat, add the diced onion, and cook for 3 to 4 minutes while stirring occasionally until the onion becomes soft and translucent without becoming deeply browned.
Step 3: Add the Garlic
Add the minced garlic to the softened onion and cook for about 30 seconds while stirring constantly until the garlic becomes fragrant, taking care not to let it brown because burnt garlic can make the beans taste bitter.
Step 4: Toast the Seasonings
Add the cumin, chili powder, smoked paprika, oregano, and black pepper to the skillet and stir continuously for about 20 to 30 seconds so the spices warm in the oil and release their aroma.
Step 5: Add the Refried Beans
Spoon the canned refried beans into the skillet and stir them into the seasoned onion and garlic mixture, breaking up any large lumps with a wooden spoon as the beans begin to warm.
Step 6: Add the Broth
Pour the broth into the skillet gradually while stirring continuously, adding enough liquid to loosen the beans without making them watery and scraping the bottom of the skillet so the flavorful seasonings become incorporated.
Step 7: Cook the Beans
Reduce the heat to medium low and cook the beans for 5 to 7 minutes, stirring every minute or so, until they become hot, creamy, and evenly seasoned while maintaining a thick consistency.
Step 8: Adjust the Texture
Check the consistency and add another tablespoon of broth if the beans seem too thick, or continue cooking uncovered for another minute or two if they appear too loose, remembering that the beans will thicken slightly as they stand.
Step 9: Add the Lime Juice
Remove the skillet from the heat and stir in the fresh lime juice, tasting the beans afterward and adjusting the salt or spices gradually until the flavor tastes balanced.
Step 10: Finish and Serve
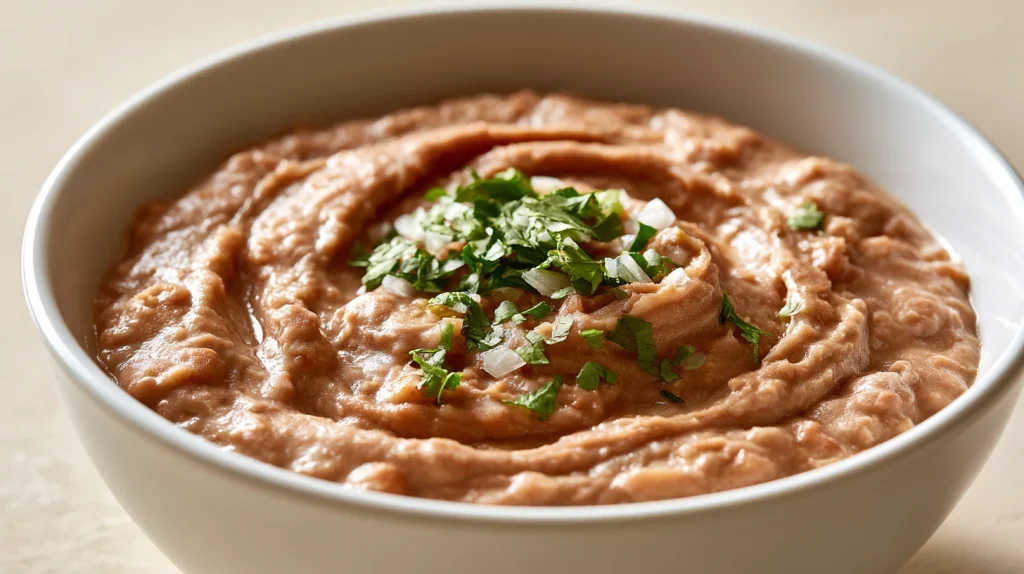
Transfer the hot beans to a serving bowl, garnish with queso fresco, cilantro, jalapeño, or diced onion if desired, and serve immediately while the texture is creamy and spreadable.
How to Serve
A well prepared refried beans recipe canned can be served in far more ways than simply placing it beside tacos. Because the beans are creamy and thick, they work as a side, filling, topping, or base for other dishes.
For a simple dinner presentation, spoon the beans into a shallow serving bowl and create a smooth surface with the back of a spoon. Add a small amount of crumbled queso fresco, chopped cilantro, and thinly sliced jalapeño in the center. Keep the toppings restrained so the creamy beans remain the focus.
For parties, serve the beans warm in a small slow cooker or heatproof serving dish. Keep extra broth nearby so you can loosen the beans if they become too thick while sitting. This is particularly useful when preparing Recipes That Use Refried Beans for a larger gathering.
Additional Tips
One of the biggest mistakes with canned refried beans is treating them as though they need only heat. Canned beans are convenient, but they often benefit from additional moisture and fresh aromatics. Onion and garlic create a savory foundation, while cumin and chili powder provide warmth. The broth improves the consistency and helps carry those flavors through the beans.
The final tasting step is equally important. Salt, lime, and spice should work together rather than compete. If the beans taste dull, do not automatically add more chili powder. A small amount of salt or lime may be all they need.
Recipe Variations
Freezing and Storage
When making Recipes Using Thick Refried Beans, storing the beans slightly thicker than you would for immediate serving can actually be helpful. Once refrigerated, they become firmer and are easier to use as fillings for burritos, tostadas, and quesadillas.
Nutritional Information
Approximate values per serving, based on six servings and without optional toppings:
These values are estimates. Actual nutrition will vary according to the brand of canned refried beans, broth, oil, seasoning, and optional toppings used.
Final Words
A reliable refried beans recipe canned is worth keeping in your regular dinner rotation because it turns a convenient pantry ingredient into something much more flavorful and versatile. With just a few minutes of sautéing and simmering, canned refried beans can become creamy, savory, bright, and ready for the table.
The most important part is controlling the consistency. Add broth gradually, cook gently, and remember that the beans will become thicker as they cool. Season toward the end so you can adjust the salt, lime, and spices according to the specific brand of beans you are using.
These beans are also useful far beyond a traditional side dish. They can become the filling for burritos, the base of tostadas, part of a layered dip, or a quick addition to quesadillas and nachos. That versatility makes them particularly valuable for busy home cooks.
If you are looking for Recipes For Refried Beans that are simple enough for a weeknight, this method gives you a dependable foundation. Keep it classic with onion, garlic, cumin, and lime, or customize it with cheese, jalapeño, chipotle, or fresh toppings.
Frequently Asked Questions

Refried Beans Recipe Canned: Creamy, Savory, and Easy
6
servings5
minutes15
minutes170
kcalIngredients
- For the Refried Beans
2 cans refried pinto beans, 16 ounces each
1 tablespoon olive oil
½ medium yellow onion, finely diced
2 cloves garlic, finely minced
¼ cup low sodium chicken broth or vegetable broth
½ teaspoon ground cumin
½ teaspoon chili powder
¼ teaspoon smoked paprika
¼ teaspoon dried oregano
½ teaspoon kosher salt, or to taste
¼ teaspoon freshly ground black pepper
1 tablespoon fresh lime juice
- Optional Toppings
¼ cup crumbled queso fresco
2 tablespoons chopped fresh cilantro
1 small jalapeño, thinly sliced
2 tablespoons finely diced red onion
Lime wedges for serving
Directions
- Finely dice the onion, mince the garlic, measure the spices and broth, and open the cans of refried beans so everything is ready before you begin cooking because the aromatics cook quickly once the skillet is hot.
- Heat the olive oil in a medium skillet over medium heat, add the diced onion, and cook for 3 to 4 minutes while stirring occasionally until the onion becomes soft and translucent without becoming deeply browned.
- Add the minced garlic to the softened onion and cook for about 30 seconds while stirring constantly until the garlic becomes fragrant, taking care not to let it brown because burnt garlic can make the beans taste bitter.
- Add the cumin, chili powder, smoked paprika, oregano, and black pepper to the skillet and stir continuously for about 20 to 30 seconds so the spices warm in the oil and release their aroma.
- Spoon the canned refried beans into the skillet and stir them into the seasoned onion and garlic mixture, breaking up any large lumps with a wooden spoon as the beans begin to warm.
- Pour the broth into the skillet gradually while stirring continuously, adding enough liquid to loosen the beans without making them watery and scraping the bottom of the skillet so the flavorful seasonings become incorporated.
- Reduce the heat to medium low and cook the beans for 5 to 7 minutes, stirring every minute or so, until they become hot, creamy, and evenly seasoned while maintaining a thick consistency.
- Check the consistency and add another tablespoon of broth if the beans seem too thick, or continue cooking uncovered for another minute or two if they appear too loose, remembering that the beans will thicken slightly as they stand.
- Remove the skillet from the heat and stir in the fresh lime juice, tasting the beans afterward and adjusting the salt or spices gradually until the flavor tastes balanced.
- Transfer the hot beans to a serving bowl, garnish with queso fresco, cilantro, jalapeño, or diced onion if desired, and serve immediately while the texture is creamy and spreadable.