

Bisquick Cinnamon Rolls: Easy Homemade Recipe
Introduction to Bisquick Cinnamon Rolls
Bisquick cinnamon rolls are one of the easiest ways to enjoy warm homemade cinnamon rolls without making a traditional yeast dough. Instead of waiting for yeast to activate and dough to rise, this recipe uses Bisquick baking mix to create a soft, tender dough that can be rolled, filled, sliced, and baked in a much shorter amount of time.
The finished Bisquick cinnamon rolls have a tender, lightly golden exterior with a sweet cinnamon sugar center. The texture is different from classic yeast raised cinnamon rolls. Traditional rolls tend to be airy and stretchy, while Bisquick cinnamon rolls are more tender and biscuit like. That makes them especially useful when you want a homemade breakfast or dessert without a long preparation process.
The key to successful Bisquick cinnamon rolls is keeping the dough soft. It should hold together without becoming stiff or dry. Adding too much baking mix can make the finished rolls dense, so the dough should be handled gently and rolled only until it reaches an even thickness.
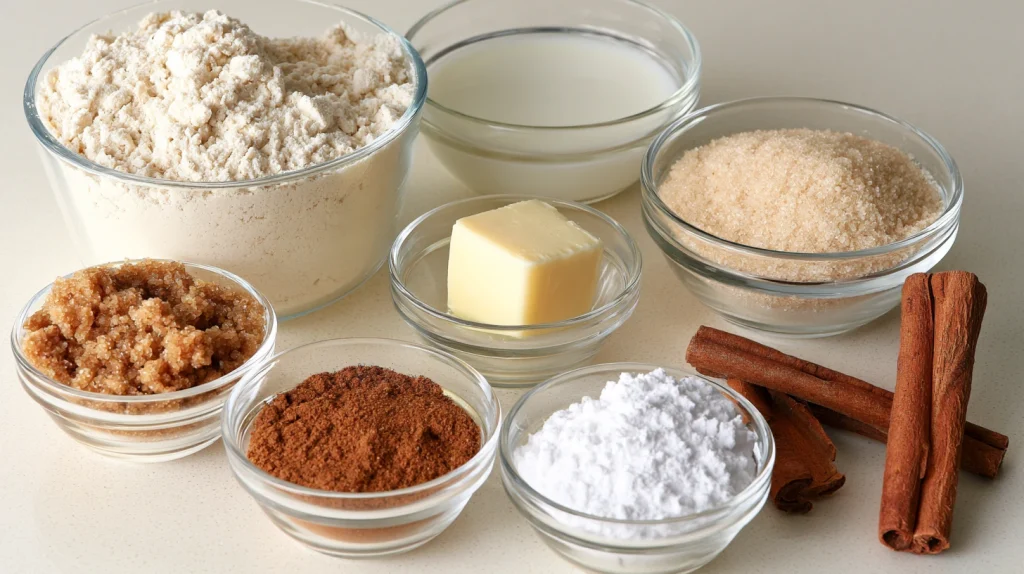
The filling is simple but important. Brown sugar provides a deeper flavor than white sugar alone, while ground cinnamon gives the rolls their familiar warmth. A small amount of softened butter helps the filling spread evenly and creates those delicious layers as the rolls bake.
These Bisquick cinnamon rolls are ideal for weekend breakfasts, brunches, afternoon snacks, holidays, or quick desserts. They are also useful when you need something homemade on short notice. Because the recipe does not require a long proofing period, you can have warm rolls on the table relatively quickly.
If you have been searching for How To Make Cinnamon Rolls With Bisquick, this recipe provides a straightforward method that works well for home cooks. It explains not only what to do, but also how the dough should look and feel at each stage.
Whether you call them Cinnamon Rolls With Bisquick, Bisquick Cinnamon Buns, or Cinnamon Rolls Bisquick, the basic idea remains the same: use a convenient baking mix to create a tender dough, add a cinnamon sugar filling, roll it tightly, slice it evenly, and bake until golden.
Why You’ll Love This Recipe
One of the biggest advantages of Bisquick cinnamon rolls is control. With yeast dough, you need to manage fermentation, proofing temperature, and rising time. With Bisquick dough, the chemical leavening does most of the work in the oven.
That does not mean technique is unimportant. The dough still needs careful handling. Overworking it can develop too much structure and make the rolls tough. The best Bisquick cinnamon rolls come from mixing just until the dough holds together.
Another important point is moisture. Bisquick baking mix can absorb liquid quickly, so add the milk gradually. You want a dough that is soft enough to roll but firm enough to maintain its shape.
The filling also benefits from restraint. A thick layer of butter and sugar may seem appealing, but too much can leak from the rolls during baking. An even, moderate layer creates better spirals and a more balanced finished pastry.

Preparation and Cooking Time, Also Serving
The exact baking time can vary according to the size of the rolls and the baking dish. Begin checking around 18 minutes. The tops should look lightly golden and the centers should be cooked through.
For a softer result, avoid baking far beyond the point of doneness. Bisquick cinnamon rolls do not need to become deeply browned to be fully baked.
Ingredients
For the Dough
For the Cinnamon Filling
For the Vanilla Glaze
Substitution Notes
Step-by-Step Instructions

Step 1: Prepare the Baking Dish and Dough
Preheat the oven to 375°F and lightly grease an 8 or 9 inch round baking dish or a similar sized square baking dish. In a mixing bowl, combine the Bisquick baking mix and granulated sugar, then add the milk, melted butter, and vanilla. Stir gently with a wooden spoon or spatula just until the mixture comes together into a soft dough. Do not continue mixing once there are no large dry patches because overmixing can make the finished Bisquick cinnamon rolls less tender.
Step 2: Prepare the Cinnamon Filling
In a small bowl, combine the softened butter, brown sugar, cinnamon, and salt until evenly blended. The butter should be soft enough to spread easily but should not be melted. A spreadable filling allows you to create an even layer without tearing the dough, which helps each Bisquick cinnamon roll develop a consistent spiral during baking.
Step 3: Roll Out the Dough
Lightly flour your work surface and place the dough on it. Gently press and roll the dough into an approximately 10 by 14 inch rectangle, keeping the thickness reasonably even from edge to edge. Avoid pressing too aggressively because the dough is tender. If it becomes sticky, dust the surface very lightly with Bisquick baking mix, but avoid adding large amounts because excess dry mix can make the finished rolls dense.
Step 4: Fill and Roll the Dough
Spread the cinnamon filling evenly over the surface of the dough, leaving a narrow border along one long edge. Starting from the opposite long edge, roll the dough into a log using steady but gentle pressure. Keep the roll firm enough to create defined spirals without compressing the dough. Pinch the final edge lightly against the log to help secure the seam.
Step 5: Slice and Arrange the Rolls
Using a sharp knife, cut the log into 10 to 12 evenly sized pieces. Arrange the rolls cut side up in the prepared baking dish, leaving a small amount of space between them. Even slicing is important because rolls of very different sizes will not finish baking at the same time. If one end is thinner than the other, adjust the pieces before placing them in the pan.
Step 6: Bake Until Golde
Place the baking dish in the preheated oven and bake for approximately 18 to 22 minutes, checking toward the end of the baking time. The tops should be lightly golden and the center of each roll should look set. If the tops brown quickly but the centers need additional time, loosely cover the dish with foil for the final few minutes. Avoid overbaking because the tender dough can become dry.
Step 7: Glaze and Serve
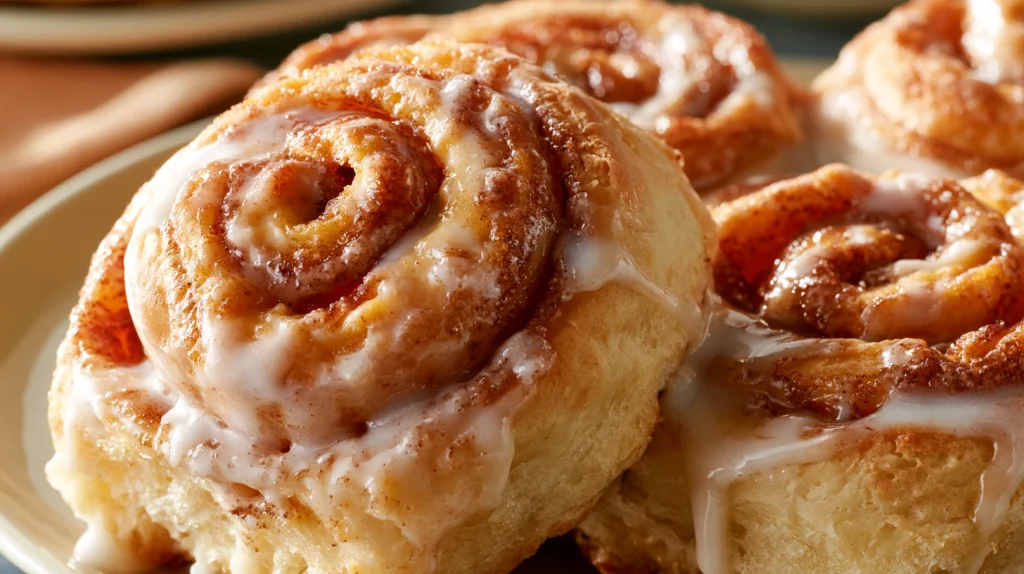
Allow the baked rolls to rest for about 5 to 10 minutes while you prepare the glaze. Whisk together the powdered sugar, milk, melted butter, vanilla, and salt until smooth. Drizzle the glaze over the warm Bisquick cinnamon rolls, letting it settle into the spirals. Serve while the rolls are still warm for the softest texture and strongest cinnamon aroma.
How to Serve
Bisquick cinnamon rolls are best served warm, shortly after the glaze has been added. The cinnamon filling becomes soft and aromatic while the glaze melts slightly across the surface.
For breakfast, serve one or two rolls with fresh fruit and coffee. Strawberries, blueberries, sliced bananas, apples, and oranges all provide a fresh contrast to the sweet pastry.
For brunch, arrange the rolls on a serving platter and drizzle the glaze in a thin pattern rather than completely covering the tops. This keeps the cinnamon spirals visible and gives the presentation a homemade bakery appearance.
For dessert, serve a warm roll with vanilla ice cream. The contrast between cold ice cream and warm cinnamon filling works particularly well.
Other serving options include:
You can also make the glaze slightly thinner and drizzle it over individual portions immediately before serving.
For a holiday table, a light dusting of powdered sugar can be added after glazing. If you use nuts, scatter them over the glaze while it is still soft so they adhere to the surface.
Additional Tips
The most common mistake when making Bisquick cinnamon rolls is adding too much dry mix. Home cooks often see a sticky dough and assume more baking mix is needed. In reality, a slightly soft dough usually produces a more tender result.
Another common issue is overworking. Unlike bread dough, Bisquick dough does not benefit from extended kneading. Once the ingredients are combined, stop mixing.
The filling should also be spread evenly. Thick pockets of butter and sugar can leak from the spiral and burn against the baking dish. A thin, consistent layer gives the rolls a more professional appearance.
For Perfectly Baked Cinnamon Rolls, pay attention to the center. The exterior can look finished before the middle is completely cooked. If necessary, carefully separate the center of one roll with a knife to check whether the dough still appears wet.
If your oven has hot spots, rotate the baking dish once during the final portion of baking. Do this quickly so the oven does not lose excessive heat.
Recipe Variations
Freezing and Storage
These rolls are particularly convenient for make ahead breakfasts. You can prepare the dough and filling, shape the rolls, and refrigerate them before baking. Because this is a baking mix based recipe rather than a traditional yeast dough, you should not expect the same overnight rise associated with yeast cinnamon rolls. Bake them relatively soon after assembly for the best texture.
If you are preparing the rolls for guests, the best approach is to bake them close to serving time. The aroma of warm cinnamon and the soft texture make a noticeable difference.
Nutritional Information
Approximate values per serving, based on one glazed roll:
These values are estimates and can change depending on the specific Bisquick product, milk, butter, glaze quantity, and final serving size.
Final Words
Bisquick cinnamon rolls prove that homemade cinnamon rolls do not always require a complicated dough or hours of preparation. With a convenient baking mix, a simple cinnamon sugar filling, and a quick vanilla glaze, you can create warm rolls that are tender, fragrant, and satisfying.
The most important techniques are simple. Keep the dough soft, avoid overmixing, spread the filling evenly, roll the dough firmly, cut consistent pieces, and bake just until golden. These small details make a major difference in the finished result.
Once you are comfortable with the basic Bisquick cinnamon rolls recipe, you can easily change the flavor. Add toasted pecans, apples, raisins, chocolate, orange zest, or maple glaze. You can even turn the same concept into mini rolls or a Quick Cinnamon Roll Casserole for a casual brunch.
If you have been looking for How To Make Cinnamon Rolls With Bisquick, this method gives you a practical starting point without the long preparation associated with traditional yeast dough. The result is a homemade pastry that feels special but remains approachable enough for an ordinary morning.
Serve the Bisquick cinnamon rolls warm with coffee, tea, fresh fruit, or a simple glass of milk. Whether you are making them for family breakfast, weekend brunch, a holiday gathering, or an afternoon treat, they are an easy way to put fresh cinnamon rolls on the table without making the process complicated.
Frequently Asked Questions

Bisquick Cinnamon Rolls: Easy, Soft, and Perfectly Baked
10
servings20
minutes22
minutes300
kcalIngredients
- For the Dough
2½ cups Bisquick baking mix
⅔ cup whole milk
2 tablespoons granulated sugar
2 tablespoons melted unsalted butter
1 teaspoon vanilla extract
- For the Cinnamon Filling
4 tablespoons unsalted butter, softened
½ cup packed brown sugar
1½ tablespoons ground cinnamon
¼ teaspoon salt
- For the Vanilla Glaze
1 cup powdered sugar
2 tablespoons milk
1 tablespoon melted butter
½ teaspoon vanilla extract
Small pinch of salt
Directions
- Preheat the oven to 375°F and lightly grease an 8 or 9 inch round baking dish or a similar sized square baking dish. In a mixing bowl, combine the Bisquick baking mix and granulated sugar, then add the milk, melted butter, and vanilla. Stir gently with a wooden spoon or spatula just until the mixture comes together into a soft dough. Do not continue mixing once there are no large dry patches because overmixing can make the finished Bisquick cinnamon rolls less tender.
- In a small bowl, combine the softened butter, brown sugar, cinnamon, and salt until evenly blended. The butter should be soft enough to spread easily but should not be melted. A spreadable filling allows you to create an even layer without tearing the dough, which helps each Bisquick cinnamon roll develop a consistent spiral during baking.
- Lightly flour your work surface and place the dough on it. Gently press and roll the dough into an approximately 10 by 14 inch rectangle, keeping the thickness reasonably even from edge to edge. Avoid pressing too aggressively because the dough is tender. If it becomes sticky, dust the surface very lightly with Bisquick baking mix, but avoid adding large amounts because excess dry mix can make the finished rolls dense.
- Spread the cinnamon filling evenly over the surface of the dough, leaving a narrow border along one long edge. Starting from the opposite long edge, roll the dough into a log using steady but gentle pressure. Keep the roll firm enough to create defined spirals without compressing the dough. Pinch the final edge lightly against the log to help secure the seam.
- Using a sharp knife, cut the log into 10 to 12 evenly sized pieces. Arrange the rolls cut side up in the prepared baking dish, leaving a small amount of space between them. Even slicing is important because rolls of very different sizes will not finish baking at the same time. If one end is thinner than the other, adjust the pieces before placing them in the pan.
- Place the baking dish in the preheated oven and bake for approximately 18 to 22 minutes, checking toward the end of the baking time. The tops should be lightly golden and the center of each roll should look set. If the tops brown quickly but the centers need additional time, loosely cover the dish with foil for the final few minutes. Avoid overbaking because the tender dough can become dry.
- Allow the baked rolls to rest for about 5 to 10 minutes while you prepare the glaze. Whisk together the powdered sugar, milk, melted butter, vanilla, and salt until smooth. Drizzle the glaze over the warm Bisquick cinnamon rolls, letting it settle into the spirals. Serve while the rolls are still warm for the softest texture and strongest cinnamon aroma.