Japanese Fried Rice – Easy Hibachi Style Fried Rice at Home
Try This Yummy Japanese Fried Rice
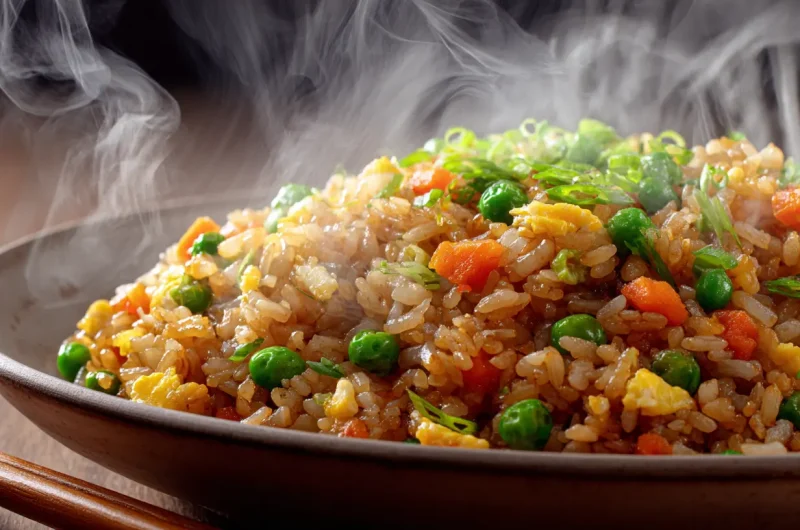
Japanese fried rice is a simple yet deeply flavorful dish that captures the essence of Japanese home cooking balance, texture, and taste. Known for its clean flavors and delicate seasoning, this dish turns humble ingredients into something memorable. Unlike heavy, oil-drenched versions you might find elsewhere, Japanese fried rice focuses on freshness and subtlety. Each grain of rice is distinct, lightly seasoned with soy sauce and butter, and enhanced by vegetables, eggs, and bits of protein like shrimp, chicken, or beef.
What makes Japanese fried rice special is its technique. The rice is cooked ahead of time, allowed to cool, and then fried at high heat to achieve that signature light and fluffy texture. The flavor is gentle yet complex buttery, slightly smoky, and savory. It’s a staple side dish at hibachi restaurants, often served sizzling beside grilled meats and dipping sauces. At home, learning how to make hibachi rice at home opens up countless meal possibilities. It’s quick, satisfying, and one of the best examples of how simple cooking can still taste extraordinary.
Why You’ll Love This Recipe
As a chef, I love recipes that transform everyday ingredients into restaurant-quality meals. Japanese fried rice does exactly that. It’s one of the easiest quick home meals that never fails to impress, whether served with hibachi chicken, shrimp, or even on its own.
You’ll love this recipe because it’s incredibly versatile. Once you understand the core technique, you can use any vegetables or proteins you have on hand. Cold leftover rice becomes the perfect base each grain stays separate, creating that classic fried rice texture.

It’s also balanced in flavor. The combination of soy sauce, butter, and optional garlic gives it a warm umami depth, while the vegetables add color and freshness. You’ll learn how to make the best fried rice right on your stovetop, no fancy teppanyaki grill required.
Finally, this dish is practical and efficient. It uses ingredients most kitchens already have, cooks in under 20 minutes, and makes a satisfying meal or side. Whether you’re craving restaurant-style hibachi fried rice easy enough for a weeknight, or a polished dish for guests, this recipe delivers consistent results every time.
Preparation and Cooking Time, also Serving
Ingredients
For the Fried Rice
Optional Add-ins
Substitution Notes

Step-by-Step Instructions

Step 1: Prepare the Rice
Start with cooked rice that’s completely cooled. Day-old rice is best because it has less moisture and fries beautifully. If you’re using freshly cooked rice, spread it on a tray and refrigerate for at least 30 minutes. This step prevents the rice from clumping during frying and helps you achieve that classic hibachi style fried rice texture.

Step 2: Heat the Pan
Place a large nonstick skillet or wok over medium-high heat. Add 1 tablespoon of butter and 1 tablespoon of oil. The combination of butter and oil provides flavor and ensures the rice won’t burn. When the butter begins to sizzle and foam slightly, you’re ready to cook.

Step 3: Scramble the Eggs
Pour the beaten eggs into the pan and swirl quickly to coat. Let them set slightly, then scramble using a spatula. Once cooked but still soft, remove them from the pan and set aside. Cooking the eggs first keeps them fluffy and prevents overcooking later.

Step 4: Sauté the Vegetables
In the same pan, add another tablespoon of oil if needed. Toss in the chopped onions and carrots, sautéing for 2 to 3 minutes until soft and fragrant. Add garlic if using, then stir in peas. These vegetables add color, texture, and subtle sweetness to balance the rice and sauce.

Step 5: Add the Rice
Add the cold rice to the pan. Break up any clumps with a spatula or spoon. Spread it out evenly so the grains come into direct contact with the hot surface. Let it sit for about 30 seconds before stirring to create slight toasty edges. This is key when learning how to make hibachi rice at home high heat and minimal stirring.

Step 6: Season the Rice
Drizzle soy sauce evenly over the rice. Stir continuously to coat every grain. Add the sesame oil, salt, and pepper. The goal is to flavor the rice without making it soggy. A touch of butter at this stage deepens the flavor and gives that signature hibachi aroma.

Step 7: Add the Eggs and Mix
Return the scrambled eggs to the pan and stir gently to combine. If you’re adding cooked chicken, shrimp, or beef, fold it in now so it heats through. Everything should be hot, evenly distributed, and lightly coated in sauce.

Step 8: Taste and Adjust
Taste a small bite and adjust seasoning as needed. Some prefer a bit more soy sauce or butter. The final result should taste balanced buttery, savory, slightly sweet, and never overly salty.

Step 9: Garnish and Serve
Turn off the heat and sprinkle with chopped green onions. They add a pop of color and a mild bite that complements the buttery rice. Serve immediately while hot.
How to Serve
Japanese fried rice pairs wonderfully with grilled meats, seafood, or vegetables. Serve it alongside hibachi chicken, teriyaki beef, or shrimp for a full hibachi-style meal. For sauce lovers, drizzle with yum yum sauce, ginger sauce, or a light teriyaki glaze.
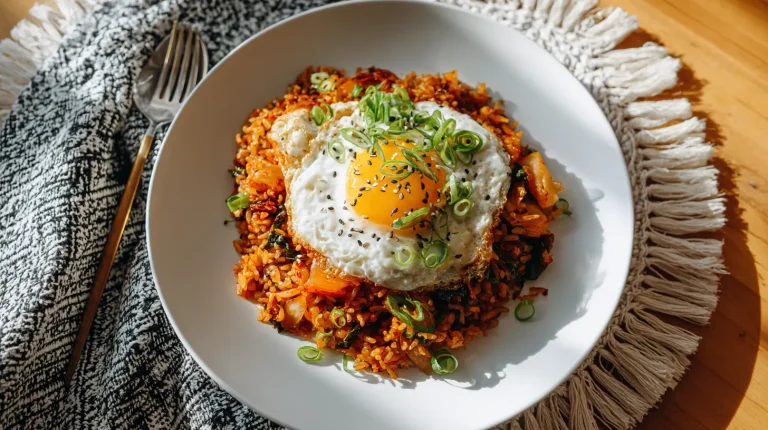
For presentation, serve the rice in a shallow white bowl or plate, allowing the colors to stand out. A sprinkle of toasted sesame seeds adds a nice finishing touch. If you’re preparing this for a party, serve it in small bowls with chopsticks for a fun, restaurant-style touch.

Additional Tips
Recipe Variations
Freezing and Storage
Nutritional Information
(Approximate per serving)
Final Words
Japanese fried rice is proof that simple ingredients can deliver incredible flavor when handled with the right technique. Every bite is buttery, lightly seasoned, and deeply satisfying. Once you learn how to make hibachi rice at home, you’ll see that restaurant-style fried rice isn’t difficult it just requires attention to detail.
This dish fits any occasion: a quick home meal, a side for hibachi dinners, or even a stand-alone comfort food. The balance of flavor, texture, and aroma makes it a family favorite. It’s also a great way to use leftover rice without wasting a grain.
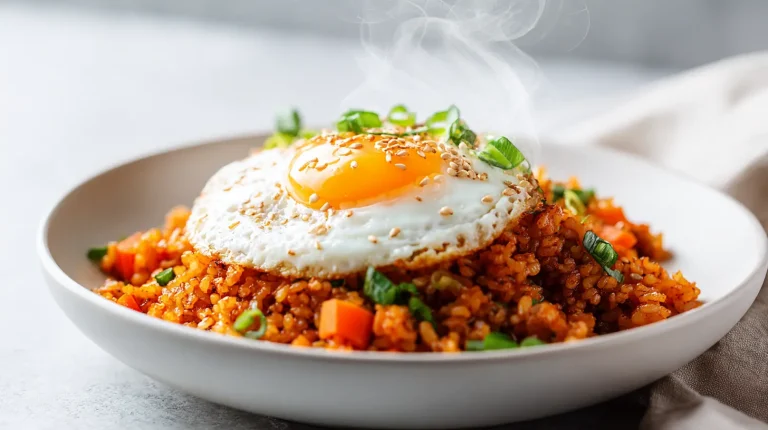
Once you master this, you can customize endlessly add seafood, make it spicy, or top with a fried egg for brunch. Whether you’re recreating the best hibachi night at home or simply craving something quick and delicious, Japanese fried rice is a timeless recipe worth keeping in your kitchen rotation.
FAQ’s
Japanese Fried Rice – Easy Hibachi Style Fried Rice at Home
Course: Rice Recipes4
servings15
minutes20
minutes330
kcalIngredients
- For the Fried Rice
4 cups cold cooked Japanese short-grain rice (1 day old)
2 tablespoons unsalted butter
2 tablespoons vegetable oil
2 large eggs, lightly beaten
1 small onion, finely chopped
1 small carrot, diced
½ cup frozen peas (thawed)
2 cloves garlic, minced (optional)
2 tablespoons soy sauce (adjust to taste)
½ teaspoon sesame oil
¼ teaspoon salt
¼ teaspoon freshly ground black pepper
2 tablespoons chopped green onions for garnish
- Optional Add-ins
½ cup cooked chicken, shrimp, or beef for a protein-rich version
1 tablespoon Japanese soy sauce or hibachi sauce for extra flavor
Dash of rice vinegar for a hint of tang
Directions
- Start with cooked rice that’s completely cooled. Day-old rice is best because it has less moisture and fries beautifully. If you’re using freshly cooked rice, spread it on a tray and refrigerate for at least 30 minutes. This step prevents the rice from clumping during frying and helps you achieve that classic hibachi style fried rice texture.
- Place a large nonstick skillet or wok over medium-high heat. Add 1 tablespoon of butter and 1 tablespoon of oil. The combination of butter and oil provides flavor and ensures the rice won’t burn. When the butter begins to sizzle and foam slightly, you’re ready to cook.
- Pour the beaten eggs into the pan and swirl quickly to coat. Let them set slightly, then scramble using a spatula. Once cooked but still soft, remove them from the pan and set aside. Cooking the eggs first keeps them fluffy and prevents overcooking later.
- In the same pan, add another tablespoon of oil if needed. Toss in the chopped onions and carrots, sautéing for 2 to 3 minutes until soft and fragrant. Add garlic if using, then stir in peas. These vegetables add color, texture, and subtle sweetness to balance the rice and sauce.
- Add the cold rice to the pan. Break up any clumps with a spatula or spoon. Spread it out evenly so the grains come into direct contact with the hot surface. Let it sit for about 30 seconds before stirring to create slight toasty edges. This is key when learning how to make hibachi rice at home high heat and minimal stirring.
- Drizzle soy sauce evenly over the rice. Stir continuously to coat every grain. Add the sesame oil, salt, and pepper. The goal is to flavor the rice without making it soggy. A touch of butter at this stage deepens the flavor and gives that signature hibachi aroma.
- Return the scrambled eggs to the pan and stir gently to combine. If you’re adding cooked chicken, shrimp, or beef, fold it in now so it heats through. Everything should be hot, evenly distributed, and lightly coated in sauce.
- Taste a small bite and adjust seasoning as needed. Some prefer a bit more soy sauce or butter. The final result should taste balanced buttery, savory, slightly sweet, and never overly salty.
- Turn off the heat and sprinkle with chopped green onions. They add a pop of color and a mild bite that complements the buttery rice. Serve immediately while hot.
Notes
- Always use cold, day-old rice for the best texture. Warm rice will turn mushy.
- Keep the heat high. Quick cooking at high heat prevents the rice from steaming.
- Don’t overcrowd the pan. Cook in batches if necessary to maintain heat.
- A little butter at the end enhances flavor and creates that authentic hibachi-on-stove richness.
- Use a wide wok or skillet to allow the rice to fry evenly.
- If you like smoky flavor, let parts of the rice toast slightly before stirring again.


