

Best Donut Tower – Birthday Party and Event Special Dessert
Donut Tower
A donut tower is one of the most eye catching dessert centerpieces you can create for a celebration. Instead of arranging donuts on a flat tray, they are stacked into an elegant tower that becomes both a delicious dessert and a decorative focal point. The finished display looks impressive, yet it is surprisingly simple to assemble with a little planning and a few basic tools. Whether you are hosting a birthday, baby shower, wedding, holiday gathering, or family brunch, a well made donut tower instantly adds excitement to the dessert table.
The beauty of a donut tower comes from its combination of height, color, and variety. Guests are naturally drawn to a display that offers different donut flavors, colorful glazes, and attractive decorations arranged in neat layers. Every person can easily grab their favorite donut without the need for slicing or serving utensils, making this one of the most practical desserts for parties of any size.
Unlike many elaborate desserts, a donut tower does not require advanced baking skills. You can prepare homemade donuts from scratch or use high quality bakery donuts to save time. The focus is on building a stable, attractive display while selecting flavors and decorations that complement each other. This flexibility makes a donut tower perfect for beginners as well as experienced home bakers.
One of the biggest reasons people love a donut tower is its versatility. It can be elegant enough for weddings, playful enough for children’s birthdays, or festive enough for holiday parties. It works equally well as a breakfast centerpiece, afternoon dessert station, or evening party treat. Because donuts come in so many flavors and sizes, every guest can find something they enjoy.
A donut tower is especially popular for Birthday Party Donuts because it creates a memorable presentation without requiring a traditional cake. Many families now choose a donut tower instead of a frosted cake since it offers more variety while making serving much easier. Children especially enjoy choosing from different glazed, chocolate, sprinkled, or filled donuts. If you enjoy browsing Doughnut Display Ideas, you will quickly notice that towering arrangements have become one of the most requested party trends. Their attractive appearance photographs beautifully and creates an inviting dessert table that guests remember long after the celebration ends.
Another reason the donut tower continues growing in popularity is its flexibility for themed events. It fits perfectly with rustic celebrations, elegant weddings, modern birthday parties, baby showers, graduation parties, and seasonal gatherings. Whether you call it a Donuts Tower or simply a donut tower, the concept remains the same. Beautiful donuts are arranged into a stable vertical display that combines decoration with dessert.
Parents also love creating a donut tower for children’s celebrations because it works wonderfully alongside other 1st Birthday Treats. Small donuts, colorful icing, and fun decorations help create a dessert table that feels cheerful without requiring complicated cake decorating skills. Creative hosts often match their donut tower with coordinating Doughnut Decor such as balloons, flowers, cake stands, ribbons, themed signs, and decorative serving boards. Together these elements transform an ordinary dessert into an impressive party centerpiece.
Among today’s most popular Dessert Towers, the donut tower stands out because it is affordable, easy to customize, and simple to assemble. Some celebrations even feature a Donut Tree Birthday display that uses miniature donuts attached around a cone shaped stand for a playful presentation. Others prefer a Mini Donut Tree made with bite sized donuts that guests can easily grab while mingling. No matter how you personalize it, a donut tower combines delicious flavor with beautiful presentation. Once you learn the simple techniques for building a stable display, you will find yourself creating a donut tower for birthdays, holidays, showers, brunches, office parties, and many other special occasions throughout the year.
Why You’ll Love This Recipe
Preparation and Cooking Time, Also Serving
Ingredients
For the Vanilla Glaze
For Decoration
For the Tower Assembly
Substitution Notes
Step by Step Instructions

Step 1: Prepare the Dough
Pour the warm milk into a large mixing bowl and sprinkle the yeast over the top. Let it sit for about five to ten minutes until it becomes foamy. Add the sugar, eggs, melted butter, vanilla extract, and salt, then gradually mix in the flour until a soft dough forms. Knead the dough for about eight to ten minutes until it becomes smooth, elastic, and slightly tacky without sticking heavily to your hands. Proper kneading develops the structure needed for light, fluffy donuts that hold their shape inside the donut tower.
Step 2: Let the Dough Rise
Transfer the dough to a lightly greased bowl and cover it with a clean kitchen towel or plastic wrap. Allow it to rise in a warm place for about one to one and a half hours, or until doubled in size. A full rise creates an airy texture that gives the finished donut tower a lighter appearance while ensuring each donut remains soft and tender.
Step 3: Roll and Cut the Donuts
Gently punch down the risen dough and transfer it to a lightly floured work surface. Roll it to approximately half an inch thick. Use a donut cutter or two round cutters to cut the donut shapes. Place the cut donuts and donut holes on parchment paper, leaving enough space between them for a second rise. Gather the remaining dough, reroll it once, and cut additional donuts until all the dough has been used.
Step 4: Allow the Donuts to Rise Again
Cover the shaped donuts loosely with a towel and let them rise for another thirty to forty minutes. This second rise is important because it creates lighter donuts that fry evenly and produce a beautiful texture. Avoid rushing this stage since properly risen donuts make a much more attractive donut tower.
Step 5: Fry the Donuts
Heat the vegetable oil to 350 degrees Fahrenheit in a deep, heavy pot. Carefully lower a few donuts into the hot oil without overcrowding the pan. Fry each side for about one to two minutes until evenly golden brown. Transfer the cooked donuts to a wire rack lined with parchment paper underneath to catch excess oil. Allow them to cool completely before glazing because warm donuts can cause the glaze to become thin and run excessively.
How to Serve
A donut tower is more than just dessert. It becomes the centerpiece of the table, so presentation is just as important as flavor. Place the finished donut tower in the center of your dessert table where guests can easily admire and access it from every side. Leave enough space around the base so people can comfortably remove donuts without disturbing the structure.
Arrange matching decorations around the base of the donut tower to create a polished display. Fresh flowers, decorative greenery, ribbons, balloons, themed cake toppers, or battery operated fairy lights all work beautifully depending on the occasion. Keep decorations away from the edible portions of the donuts to maintain food safety.
For birthdays, surround the donut tower with colorful candies, cupcakes, cookies, and fresh fruit. This creates a complete dessert station that appeals to both children and adults. If you are serving Birthday Party Donuts, matching the icing colors with your party theme creates an attractive and coordinated look.
A donut tower pairs wonderfully with beverages such as:
Offer a few dipping sauces in small bowls beside the donut tower for guests who enjoy extra flavor.
Popular dipping sauces include:
Miniature versions also make wonderful Mini Donut Tree displays for dessert buffets, baby showers, and office parties. These smaller displays fit comfortably on buffet tables while still providing an attractive presentation.
Whether you call it a donut tower or a Donuts Tower, serving it as the centerpiece ensures it becomes one of the first things guests notice when they enter the room.
Additional Tips
Recipe Variations
Freezing and Storage
Nutritional Information
Approximate values per serving
Nutritional values are approximate and may vary depending on ingredients, glazes, toppings, and portion size.
Final Words
A donut tower proves that impressive desserts do not have to be complicated. With a little planning, fresh ingredients, and careful assembly, you can create a beautiful centerpiece that tastes just as wonderful as it looks. Whether you prepare homemade donuts or use your favorite bakery selection, the finished display brings excitement to any celebration.
A donut tower is perfect for Birthday Party Donuts, holiday gatherings, weddings, baby showers, brunches, office celebrations, and family events because it combines convenience with stunning presentation. Guests appreciate the variety, the easy serving style, and the attractive display that immediately becomes the focal point of the dessert table.
As you become more comfortable making a donut tower, you can experiment with different glazes, decorations, colors, and themes to suit every occasion. Explore new Doughnut Display Ideas, personalize your Doughnut Decor, and create unique Dessert Towers that reflect your own style. Whether you build a classic donut tower, a playful Donuts Tower, a festive Donut Tree Birthday centerpiece, or a charming Mini Donut Tree, this recipe gives you the confidence to create a memorable dessert that friends and family will look forward to every time you celebrate.
FAQs

Best Donut Tower – Birthday Party and Event Special Dessert
Course: Desserts20
servings45
minutes15
minutes310
kcalIngredients
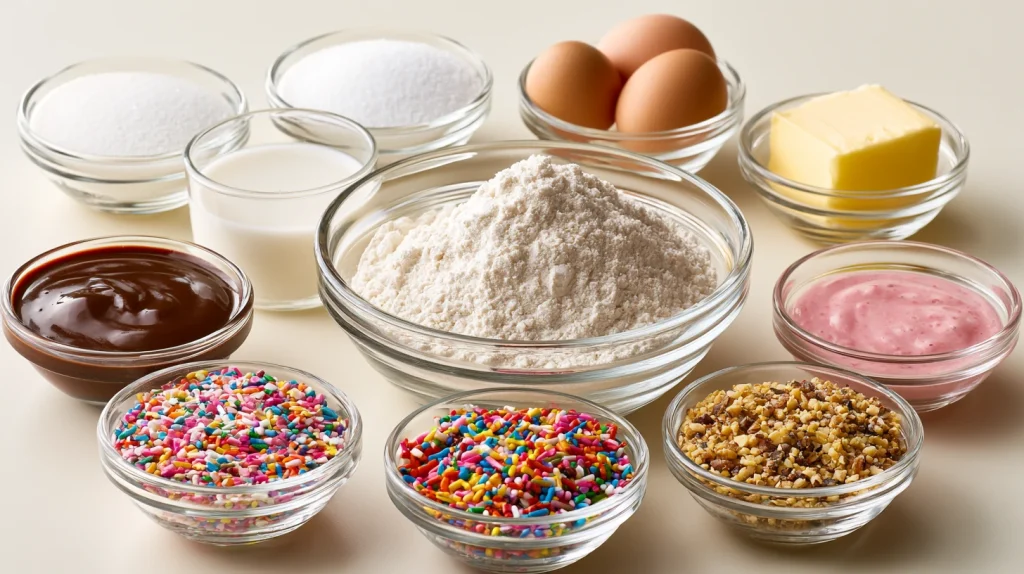
4 cups all purpose flour
¼ cup granulated sugar
2¼ teaspoons active dry yeast
1 cup warm whole milk
2 large eggs
¼ cup unsalted butter, melted
1 teaspoon vanilla extract
½ teaspoon salt
Vegetable oil for frying
- For the Vanilla Glaze
2½ cups powdered sugar
4 tablespoons whole milk
1 teaspoon vanilla extract
Pinch of salt
- For Decoration
½ cup rainbow sprinkles
¼ cup chocolate sprinkles
¼ cup crushed freeze dried strawberries
¼ cup chopped pistachios
¼ cup toasted coconut flakes
Edible gold sprinkles
Fresh flowers suitable for food presentation, optional
Decorative ribbon for the stand, optional
- For the Tower Assembly
1 foam cone or reusable donut tower stand, about 16 to 18 inches tall
Toothpicks or decorative food safe picks as needed
Parchment paper for cooling
Directions
- Pour the warm milk into a large mixing bowl and sprinkle the yeast over the top. Let it sit for about five to ten minutes until it becomes foamy. Add the sugar, eggs, melted butter, vanilla extract, and salt, then gradually mix in the flour until a soft dough forms. Knead the dough for about eight to ten minutes until it becomes smooth, elastic, and slightly tacky without sticking heavily to your hands. Proper kneading develops the structure needed for light, fluffy donuts that hold their shape inside the donut tower.
- Transfer the dough to a lightly greased bowl and cover it with a clean kitchen towel or plastic wrap. Allow it to rise in a warm place for about one to one and a half hours, or until doubled in size. A full rise creates an airy texture that gives the finished donut tower a lighter appearance while ensuring each donut remains soft and tender.
- Gently punch down the risen dough and transfer it to a lightly floured work surface. Roll it to approximately half an inch thick. Use a donut cutter or two round cutters to cut the donut shapes. Place the cut donuts and donut holes on parchment paper, leaving enough space between them for a second rise. Gather the remaining dough, reroll it once, and cut additional donuts until all the dough has been used.
- Cover the shaped donuts loosely with a towel and let them rise for another thirty to forty minutes. This second rise is important because it creates lighter donuts that fry evenly and produce a beautiful texture. Avoid rushing this stage since properly risen donuts make a much more attractive donut tower.
- Heat the vegetable oil to 350 degrees Fahrenheit in a deep, heavy pot. Carefully lower a few donuts into the hot oil without overcrowding the pan. Fry each side for about one to two minutes until evenly golden brown. Transfer the cooked donuts to a wire rack lined with parchment paper underneath to catch excess oil. Allow them to cool completely before glazing because warm donuts can cause the glaze to become thin and run excessively.