

Salt and Pepper Shrimp Recipe – Easy & Crispy Dinner Meal
Salt and Pepper Shrimp
Salt and pepper shrimp is a classic seafood dish that delivers big flavor with only a handful of simple ingredients. Instead of relying on thick sauces or heavy batters, this recipe highlights the natural sweetness of fresh shrimp with a light crispy coating, fragrant garlic, sliced chilies, green onions, and a generous finish of freshly ground pepper. Every bite offers a satisfying combination of crunchy texture, juicy shrimp, and aromatic seasonings that make this dish a favorite in restaurants and home kitchens alike.
One of the reasons salt and pepper shrimp stands out is that the shrimp are usually cooked with the shell still on. The shell helps protect the delicate meat from drying out during frying while adding an extra layer of seafood flavor. As the shells become lightly crisp, they create a pleasant texture that many seafood lovers enjoy. If you regularly cook Shrimp With Shell On Recipes, you already know that shell on shrimp often deliver richer flavor than peeled shrimp.
Traditional versions often use whole shrimp with the heads attached because they contain natural juices that enhance the seafood flavor during cooking. People looking for Shrimp With Head Recipes or Shrimp With Heads On Recipes often choose this method because it creates the most authentic taste. Even if you are searching for Head On Shrimp Recipes Simple enough for beginners, this recipe is easy to follow while producing impressive results.
The seasoning may sound basic, but it is carefully balanced. Salt enhances the sweetness of the shrimp while freshly ground black pepper provides warmth without overwhelming the seafood. Garlic becomes lightly golden and fragrant, fresh chilies add a gentle kick, and green onions bring freshness that ties everything together. Every ingredient has a purpose, and none of them hide the natural flavor of the shrimp.
This recipe is also extremely versatile. It works as an appetizer, family dinner, or centerpiece for entertaining guests. Since the shrimp are easy to pick up and eat, they are a popular choice among Shrimp Recipes For Party where everyone can enjoy crispy seafood straight from the serving platter.
Home cooks also appreciate that this recipe does not require complicated techniques or expensive ingredients. Once you understand how to dry the shrimp properly, coat them lightly, and fry them at the correct temperature, you can consistently make restaurant quality results in your own kitchen. Whether you enjoy Shrimp With Shell On Recipes, Unpeeled Shrimp Recipes, or other Shell On Shrimp Recipes, this dish deserves a place in your recipe collection. It can even be adapted for Pre Cooked Shrimp Recipes by shortening the frying time while keeping the same flavorful seasoning.
Why You’ll Love This Recipe
Preparation and Cooking Time, Also Serving
Ingredients
Substitution Notes
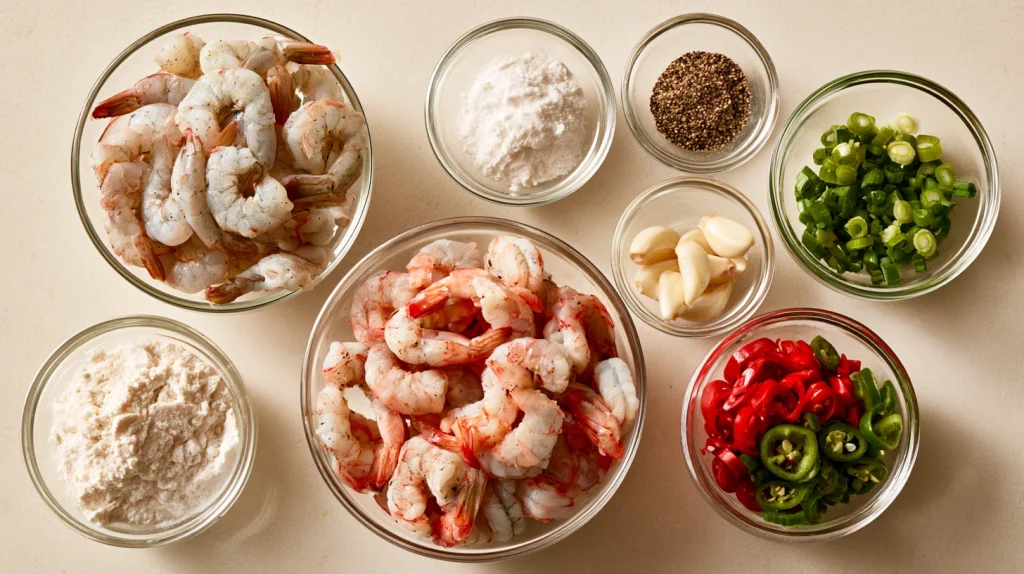
Step-by-Step Instructions

Step 1: Prepare the Shrimp
Rinse the shrimp under cold running water and trim the long antennae if you are using head on shrimp. Using kitchen scissors, carefully cut along the back of each shrimp shell and remove the dark vein while leaving the shell attached. Rinse briefly once more if needed, then pat every shrimp completely dry with paper towels. Removing excess moisture is one of the most important steps because dry shrimp hold the coating better and fry into a crisp, golden crust instead of becoming soft or oily.
Step 2: Season the Shrimp
Transfer the dried shrimp to a large mixing bowl and sprinkle them evenly with the salt, black pepper, and white pepper. Toss gently until every shrimp is lightly coated with the seasoning, then let them rest for about 10 minutes. This short resting period allows the seasoning to lightly flavor the shrimp while helping the coating adhere more evenly during frying.
Step 3: Prepare the Coating
In another large bowl, whisk together the cornstarch, all purpose flour, baking powder, garlic powder, and onion powder until fully combined. Add the seasoned shrimp and toss until each piece is evenly coated with a thin layer of the dry mixture. Shake off any excess coating before frying because a light coating produces a crisp texture that allows the shrimp’s natural sweetness to remain the focus.
Step 4: Heat the Oil
Pour enough vegetable oil into a deep heavy pot or wok to allow the shrimp to fry comfortably without touching the bottom, then heat the oil to 350°F or 175°C. If you do not have a thermometer, drop a small pinch of the coating into the oil. It should immediately sizzle and float to the surface without turning dark too quickly, indicating that the oil has reached the proper frying temperature.
Step 5: Fry the Shrimp
Carefully lower a few coated shrimp into the hot oil, making sure not to overcrowd the pan, and fry them for about 2 to 3 minutes while turning occasionally until the coating becomes lightly golden and crisp and the shrimp turn opaque with a gentle curl. Remove the shrimp with a slotted spoon and place them on a wire rack so excess oil drains away while the coating stays crispy, then continue frying the remaining shrimp in small batches.
Step 6: Cook the Aromatics
Heat one tablespoon of vegetable oil in a large wok or skillet over medium heat, then add the minced garlic and stir continuously for about 30 seconds until fragrant. Add the sliced red chilies and cook for another 30 seconds before stirring in the green onions. Continue cooking briefly until the onions soften slightly while still maintaining their fresh color and aroma.
Step 7: Toss and Serve
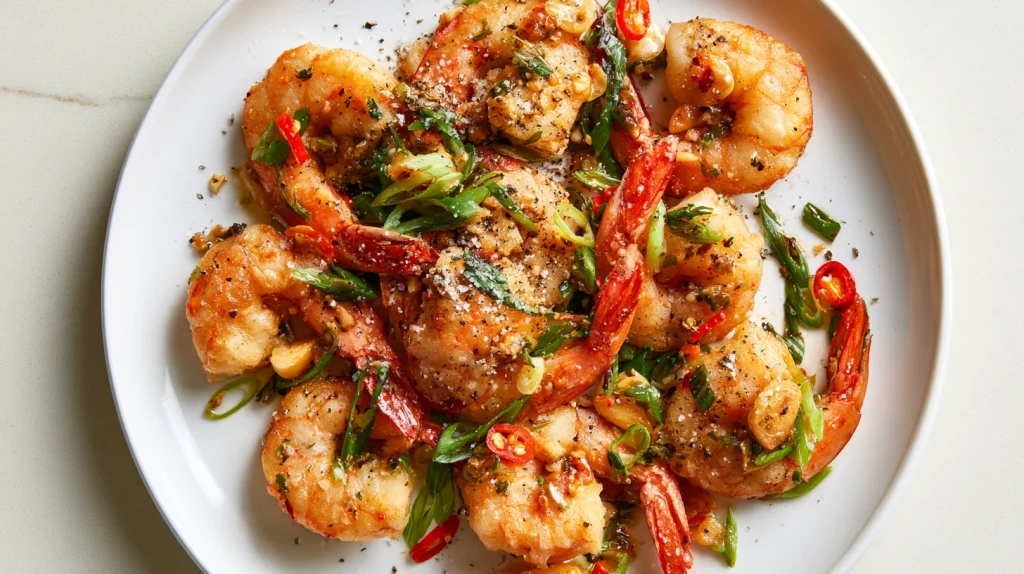
Add the freshly fried shrimp to the wok with the garlic, chilies, and green onions, then sprinkle the flaky sea salt and freshly cracked black pepper evenly over the shrimp. Toss everything together gently for about one minute so the fragrant garlic and seasonings coat every shrimp evenly, then transfer immediately to a serving platter and enjoy while the shrimp are hot and perfectly crispy.
How to Serve
Salt and pepper shrimp is best served immediately after cooking while the coating is still crisp and the garlic is fragrant. Arrange the shrimp on a large serving platter and spoon the crispy garlic, sliced chilies, and green onions over the top so every serving gets plenty of flavor. Finish with an extra pinch of freshly cracked black pepper and a light sprinkle of flaky sea salt just before serving.
For a complete meal, pair the shrimp with simple side dishes that allow the seafood to remain the star of the plate.
Although the shrimp are flavorful on their own, a few dipping sauces can complement them without overpowering the seasoning.
For parties, arrange the shrimp on a large platter with fresh herbs, lemon wedges, and small bowls of dipping sauces around the edges. This presentation makes it easy for guests to help themselves and is one reason this recipe remains one of the most popular Shrimp Recipes For Party. If you are serving multiple seafood dishes, pair these shrimp with light appetizers so their crispy texture and fresh flavor remain the highlight of the meal.
Additional Tips
Recipe Variations
Freezing and Storage
Nutritional Information
Approximate values per serving.
Nutritional values will vary depending on the size of the shrimp, the amount of coating used, and how much oil is absorbed during frying.
Final Words
Salt and pepper shrimp is proof that a handful of quality ingredients and the right cooking technique can produce an unforgettable meal. The combination of juicy shrimp, crisp shells, fragrant garlic, fresh chilies, and freshly cracked pepper creates a dish that is simple yet packed with flavor. Once you learn the basic method, you will find yourself making it again and again for family dinners, weekend gatherings, and special occasions.
Whether you prefer Shrimp With Heads On Recipes, enjoy experimenting with Head On Shrimp Recipes Simple, or are building a collection of reliable Unpeeled Shrimp Recipes, this recipe deserves a place in your kitchen. It is easy enough for beginners, rewarding for experienced cooks, and flexible enough to adapt to your own taste. With fresh ingredients, careful frying, and proper seasoning, you can enjoy restaurant quality salt and pepper shrimp whenever the craving strikes.
FAQs

Salt and Pepper Shrimp Recipe – Easy & Crispy Dinner Meal
Course: Dinner Recipes4
servings20
minutes12
minutes420
kcalIngredients
2 pounds large shell on shrimp, preferably head on
1 teaspoon salt
1 teaspoon freshly ground black pepper
½ teaspoon white pepper
1 cup cornstarch
2 tablespoons all purpose flour
1 teaspoon baking powder
1 teaspoon garlic powder
½ teaspoon onion powder
6 garlic cloves, finely minced
3 fresh red chilies, thinly sliced
3 green onions, thinly sliced
1 tablespoon vegetable oil
Vegetable oil for deep frying
½ teaspoon flaky sea salt
½ teaspoon freshly cracked black pepper
Directions
- Rinse the shrimp under cold running water and trim the long antennae if you are using head on shrimp. Using kitchen scissors, carefully cut along the back of each shrimp shell and remove the dark vein while leaving the shell attached. Rinse briefly once more if needed, then pat every shrimp completely dry with paper towels. Removing excess moisture is one of the most important steps because dry shrimp hold the coating better and fry into a crisp, golden crust instead of becoming soft or oily.
- Transfer the dried shrimp to a large mixing bowl and sprinkle them evenly with the salt, black pepper, and white pepper. Toss gently until every shrimp is lightly coated with the seasoning, then let them rest for about 10 minutes. This short resting period allows the seasoning to lightly flavor the shrimp while helping the coating adhere more evenly during frying.
- In another large bowl, whisk together the cornstarch, all purpose flour, baking powder, garlic powder, and onion powder until fully combined. Add the seasoned shrimp and toss until each piece is evenly coated with a thin layer of the dry mixture. Shake off any excess coating before frying because a light coating produces a crisp texture that allows the shrimp’s natural sweetness to remain the focus.
- Pour enough vegetable oil into a deep heavy pot or wok to allow the shrimp to fry comfortably without touching the bottom, then heat the oil to 350°F or 175°C. If you do not have a thermometer, drop a small pinch of the coating into the oil. It should immediately sizzle and float to the surface without turning dark too quickly, indicating that the oil has reached the proper frying temperature.
- Carefully lower a few coated shrimp into the hot oil, making sure not to overcrowd the pan, and fry them for about 2 to 3 minutes while turning occasionally until the coating becomes lightly golden and crisp and the shrimp turn opaque with a gentle curl. Remove the shrimp with a slotted spoon and place them on a wire rack so excess oil drains away while the coating stays crispy, then continue frying the remaining shrimp in small batches.
- Heat one tablespoon of vegetable oil in a large wok or skillet over medium heat, then add the minced garlic and stir continuously for about 30 seconds until fragrant. Add the sliced red chilies and cook for another 30 seconds before stirring in the green onions. Continue cooking briefly until the onions soften slightly while still maintaining their fresh color and aroma.
- Add the freshly fried shrimp to the wok with the garlic, chilies, and green onions, then sprinkle the flaky sea salt and freshly cracked black pepper evenly over the shrimp. Toss everything together gently for about one minute so the fragrant garlic and seasonings coat every shrimp evenly, then transfer immediately to a serving platter and enjoy while the shrimp are hot and perfectly crispy.