

Mulberry Jam Recipe – Easy Homemade Berry Jam Guide
Mulberry Jam Recipe
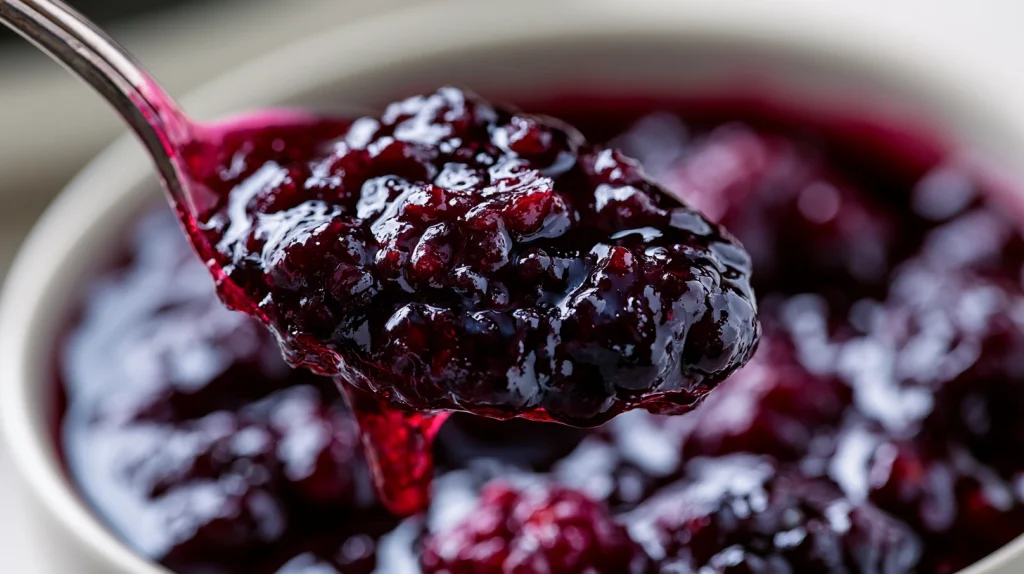
A homemade mulberry jam recipe is one of the best ways to preserve the naturally sweet and slightly tangy flavor of fresh mulberries. These small berries have a unique taste that is different from many common fruits. They offer a gentle sweetness with a mild tartness, creating a balanced flavor that becomes even richer when slowly cooked into jam. Making jam at home allows you to enjoy the true taste of mulberries without unnecessary additives. A good mulberry jam recipe focuses on enhancing the fruit’s natural qualities by combining ripe berries with the right amount of sugar and acidity. The result is a thick, glossy spread with a deep berry flavor, smooth texture, and beautiful natural color.
Mulberries are often available for a limited season, which makes preserving them a smart way to enjoy their flavor throughout the year. If you are searching for What To Make With Mulberries, homemade jam is one of the most rewarding options. Instead of allowing extra berries to spoil, you can transform them into a versatile ingredient that can be enjoyed with breakfast, desserts, and snacks.
The flavor of homemade mulberry jam is both comforting and refreshing. It has the sweetness of ripe berries with a slight citrus brightness from lemon juice, creating a spread that feels homemade and special. Unlike many store-bought versions, this jam allows the fruit flavor to remain the main focus. This mulberry recipe is simple enough for beginners but delivers results that feel professionally prepared. The cooking method is straightforward, but small details such as choosing ripe berries, balancing sugar, and cooking slowly make a major difference in the final texture and taste.
Many home cooks enjoy exploring different Mulberry Recipes Jam because mulberries work beautifully in homemade preserves. Some prefer a traditional jam with small pieces of fruit, while others like a smoother texture that spreads easily. This recipe gives you the flexibility to create the style you enjoy most.
Mulberry jam is also a valuable ingredient for baking and creative desserts. It can be added to cakes, cookies, pastries, and other sweet treats. If you enjoy experimenting with fruit-based desserts, this jam can inspire many Mulberry Recipes Desserts. It can even be used as a filling in a homemade Mulberry Pie Recipe for an extra layer of rich berry flavor. Learning How To Make Mulberry Jam at home is a useful kitchen skill because the same basic technique can be applied to many other fruits. Once you understand how fruit, sugar, and acidity work together, you can create different homemade preserves with confidence.
Whether you spread it on warm bread, add it to desserts, or gift a jar to someone special, this mulberry jam recipe brings the simple pleasure of homemade food into your kitchen.
Why You’ll Love This Recipe
Preparation and Cooking Time, also serving
The preparation process involves washing the mulberries, removing stems, and measuring the ingredients. Cooking requires patience because the fruit needs enough time to release its natural juices and develop a thick, spreadable consistency.
Allowing the jam to cool completely is important because the texture continues to set after cooking. Warm jam may appear thinner, but it will become thicker and smoother as it reaches room temperature.
This mulberry jam recipe is perfect for serving with toast, pancakes, biscuits, pastries, and desserts. It can also be stored and enjoyed whenever you want a homemade fruit spread.
Ingredients
Substitution Notes
Step-by-Step Instructions

Step 1: Prepare the Mulberries
Start by washing the mulberries gently under cool running water to remove dirt and any unwanted particles. Place the berries in a colander and allow them to drain completely because extra water can affect the final consistency of the jam. Remove the small stems from each berry and discard any damaged fruit. Once cleaned, transfer the mulberries to a large bowl and gently crush them using a potato masher or the back of a spoon. Crushing the fruit helps release the natural juices while keeping some small pieces intact, giving the jam a pleasant homemade texture.
Step 2: Combine the Ingredients
Add the crushed mulberries to a large heavy-bottomed saucepan. Pour in the sugar, lemon juice, lemon zest, and water, then stir everything together until the sugar begins coating the fruit evenly. Let the mixture rest for about 10 minutes before cooking. This short resting period allows the sugar to draw moisture from the berries, which helps the fruit cook more evenly and creates a smoother final texture.
Step 3: Cook the Mulberry Mixture
Place the saucepan over medium heat and slowly bring the mixture to a gentle boil while stirring frequently. As the mulberries heat, they will release more juice and the mixture will become darker and thicker. Continue cooking for 30 to 40 minutes, stirring regularly to prevent the fruit from sticking to the bottom of the pan. Avoid cooking over high heat because a slower process allows the flavors to develop properly while reducing the risk of burning the jam.
Step 4: Check the Jam Consistency
To test whether the jam has reached the correct consistency, place a small amount on a chilled plate and allow it to sit for a few seconds. Run your finger through the jam, and if the line stays clear without quickly filling back in, the texture is ready. If the jam is still too thin, continue cooking for a few more minutes and test again. If using pectin, add it according to the package instructions and mix thoroughly until combined.
Step 5: Blend or Strain the Jam (Optional)
Once the mulberry mixture reaches the desired thickness, you can decide on the final texture of your jam. For a smoother spread, use an immersion blender to gently blend the mixture until it reaches your preferred consistency. If you want a completely smooth jam without seeds, pass the cooked mixture through a fine mesh strainer while it is still warm, pressing gently with a spoon to extract the fruit while removing the seeds. For a more traditional homemade style, leave the jam as it is with small pieces of mulberries throughout. The texture choice depends on how you plan to use the jam, whether for spreading, baking, or adding to desserts.
Step 6: Add Final Flavor and Cool the Jam
After cooking, remove the saucepan from the heat and stir in the vanilla extract if you are using it. Mix gently to distribute the flavor throughout the jam without breaking down the texture. Allow the jam to cool slightly in the saucepan for about 10 to 15 minutes before transferring it into clean jars. Cooling the jam gradually helps it settle and develop a thicker consistency while making it easier to handle.
Step 7: Transfer and Store the Jam Properly
Carefully spoon the warm jam into clean, sterilized glass jars, leaving a small amount of space at the top. Wipe the jar rims with a clean cloth to remove any spilled jam before sealing with lids. Allow the jars to cool completely at room temperature before storing them. Once cooled, the jam should have a thick, spreadable texture with a rich berry aroma. Properly stored homemade jam can be enjoyed for several weeks in the refrigerator or preserved longer using safe canning methods.
How to Serve
Additional Tips
Recipe Variations
Freezing and Storage
Nutritional Information
Approximate nutritional values per serving (1 tablespoon):
The nutritional values can vary depending on the amount of sugar used and the natural sweetness of the mulberries. Using less sugar or low-sugar pectin will change the final nutritional content.
Mulberries naturally contain vitamins, minerals, and antioxidants, making them a flavorful fruit choice. While jam is still a sweet preserve, using fresh fruit allows you to enjoy some of the natural benefits of the berries.
Final Words
Making a homemade mulberry jam recipe is a simple but rewarding way to enjoy one of nature’s most flavorful seasonal fruits. With just a few basic ingredients and careful cooking, you can create a preserve that captures the taste of fresh mulberries in every spoonful.
The best part about homemade jam is the control it gives you. You can choose the sweetness, adjust the texture, and create a recipe that fits your family’s preferences. Whether you enjoy it spread on warm bread, added to desserts, or used as a special ingredient in baking, this jam brings a homemade touch to everyday meals.
Learning How To Make Mulberry Jam also gives you a foundation for creating many other fruit preserves. Once you understand the balance between fruit, sugar, and acidity, you can confidently explore different Jams Recipes using seasonal ingredients. This mulberry jam recipe is more than just a way to use extra berries. It is a method of preserving memories, seasonal flavors, and the simple pleasure of homemade food. A jar of fresh mulberry jam can turn an ordinary breakfast into something special and add a beautiful homemade element to desserts and snacks.
Take your time with the process, choose quality ingredients, and enjoy the satisfaction of creating something delicious from scratch. Homemade mulberry jam is a recipe worth keeping because it brings together simplicity, flavor, and the joy of cooking at home.
FAQs

Mulberry Jam Recipe – Easy Homemade Berry Jam Guide
Course: Desserts24
servings15
minutes35
minutes45
kcalIngredients
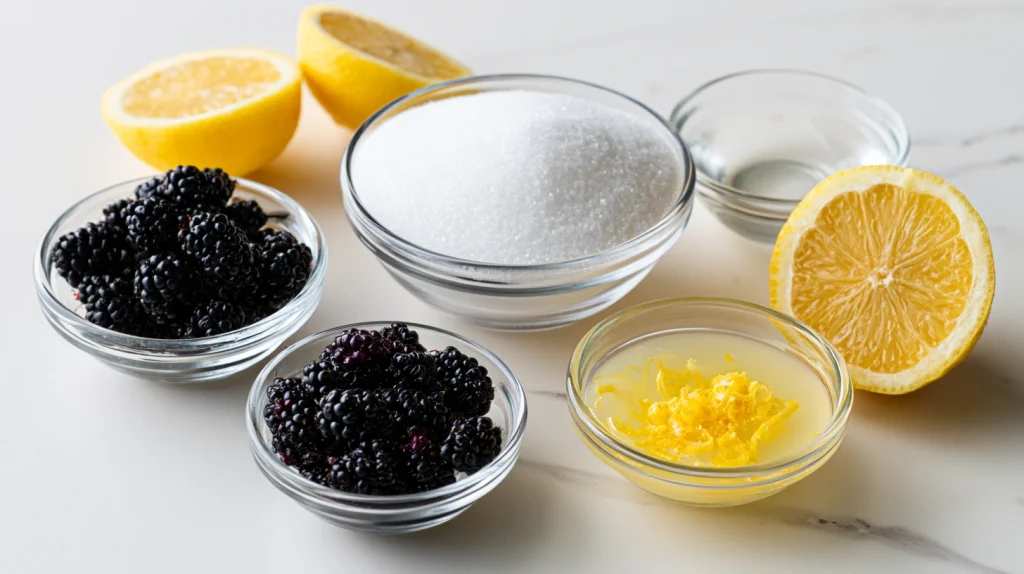
4 cups fresh mulberries, washed and stems removed
3 cups granulated sugar
2 tablespoons fresh lemon juice
1 teaspoon lemon zest
1/4 cup water
1 package powdered fruit pectin, optional
1/2 teaspoon vanilla extract
Directions
- Start by washing the mulberries gently under cool running water to remove dirt and any unwanted particles. Place the berries in a colander and allow them to drain completely because extra water can affect the final consistency of the jam. Remove the small stems from each berry and discard any damaged fruit. Once cleaned, transfer the mulberries to a large bowl and gently crush them using a potato masher or the back of a spoon. Crushing the fruit helps release the natural juices while keeping some small pieces intact, giving the jam a pleasant homemade texture.
- Add the crushed mulberries to a large heavy-bottomed saucepan. Pour in the sugar, lemon juice, lemon zest, and water, then stir everything together until the sugar begins coating the fruit evenly. Let the mixture rest for about 10 minutes before cooking. This short resting period allows the sugar to draw moisture from the berries, which helps the fruit cook more evenly and creates a smoother final texture.
- Place the saucepan over medium heat and slowly bring the mixture to a gentle boil while stirring frequently. As the mulberries heat, they will release more juice and the mixture will become darker and thicker. Continue cooking for 30 to 40 minutes, stirring regularly to prevent the fruit from sticking to the bottom of the pan. Avoid cooking over high heat because a slower process allows the flavors to develop properly while reducing the risk of burning the jam.
- To test whether the jam has reached the correct consistency, place a small amount on a chilled plate and allow it to sit for a few seconds. Run your finger through the jam, and if the line stays clear without quickly filling back in, the texture is ready. If the jam is still too thin, continue cooking for a few more minutes and test again. If using pectin, add it according to the package instructions and mix thoroughly until combined.
- Once the mulberry mixture reaches the desired thickness, you can decide on the final texture of your jam. For a smoother spread, use an immersion blender to gently blend the mixture until it reaches your preferred consistency. If you want a completely smooth jam without seeds, pass the cooked mixture through a fine mesh strainer while it is still warm, pressing gently with a spoon to extract the fruit while removing the seeds. For a more traditional homemade style, leave the jam as it is with small pieces of mulberries throughout. The texture choice depends on how you plan to use the jam, whether for spreading, baking, or adding to desserts.
- After cooking, remove the saucepan from the heat and stir in the vanilla extract if you are using it. Mix gently to distribute the flavor throughout the jam without breaking down the texture. Allow the jam to cool slightly in the saucepan for about 10 to 15 minutes before transferring it into clean jars. Cooling the jam gradually helps it settle and develop a thicker consistency while making it easier to handle.
- Carefully spoon the warm jam into clean, sterilized glass jars, leaving a small amount of space at the top. Wipe the jar rims with a clean cloth to remove any spilled jam before sealing with lids. Allow the jars to cool completely at room temperature before storing them. Once cooled, the jam should have a thick, spreadable texture with a rich berry aroma. Properly stored homemade jam can be enjoyed for several weeks in the refrigerator or preserved longer using safe canning methods.